Category Archives: Digital Media

Progress with rtc.io

At the end of July, I gave a presentation about WebRTC and rtc.io at the WDCNZ Web Dev Conference in beautiful Wellington, NZ.

webrtc_talk

Putting that talk together reminded me about how far we have come in the last year both with the progress of WebRTC, its standards and browser implementations, as well as with our own small team at NICTA and our rtc.io WebRTC toolbox.

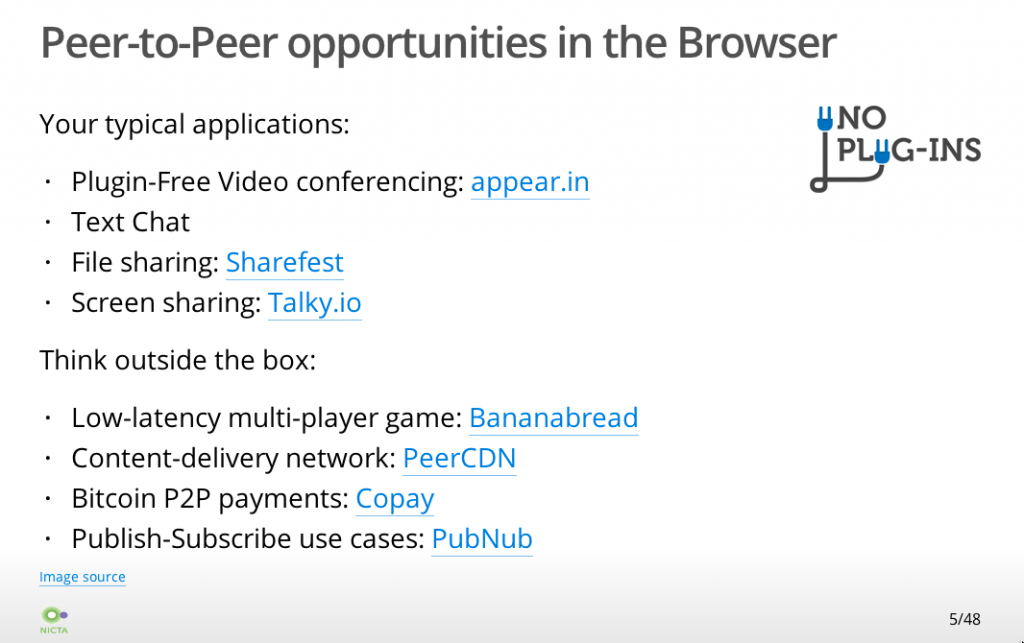
WDCNZ presentation page5

One of the most exciting opportunities is still under-exploited: the data channel. When I talked about the above slide and pointed out Bananabread, PeerCDN, Copay, PubNub and also later WebTorrent, that’s where I really started to get Web Developers excited about WebRTC. They can totally see the shift in paradigm to peer-to-peer applications away from the Server-based architecture of the current Web.

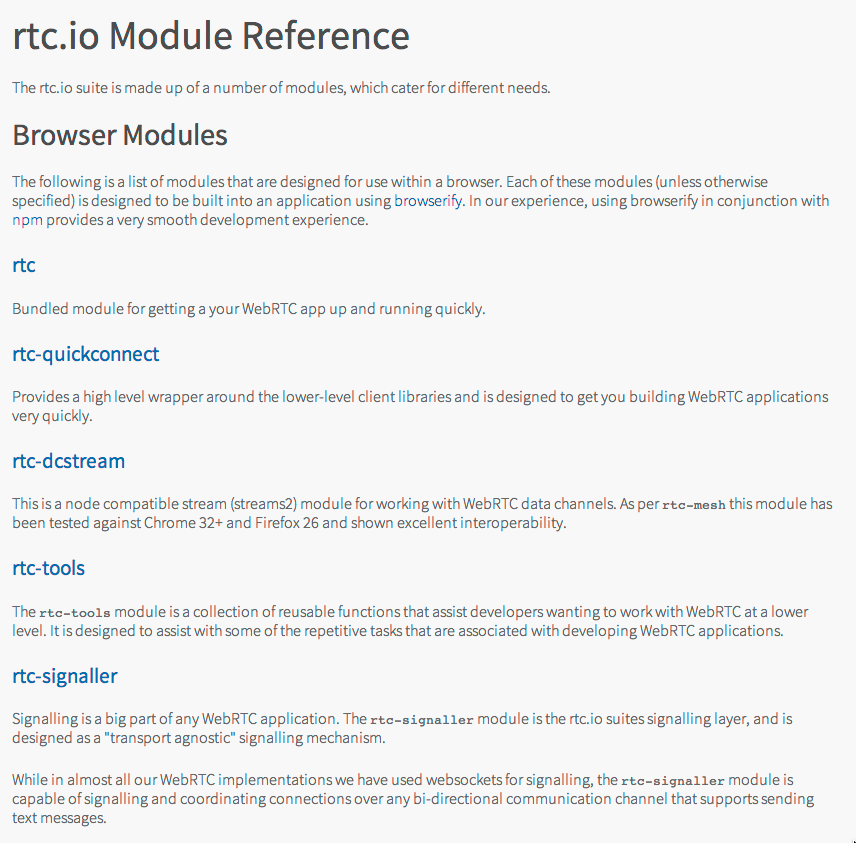
Many were also excited to learn more about rtc.io, our own npm nodules based approach to a JavaScript API for WebRTC.

rtcio_modules

We believe that the World of JavaScript has reached a critical stage where we can no longer code by copy-and-paste of JavaScript snippets from all over the Web universe. We need a more structured module reuse approach to JavaScript. Node with JavaScript on the back end really only motivated this development. However, we’ve needed it for a long time on the front end, too. One big library (jquery anyone?) that does everything that anyone could ever need on the front-end isn’t going to work any longer with the amount of functionality that we now expect Web applications to support. Just look at the insane growth of npm compared to other module collections:

Packages per day across popular platforms (Shamelessly copied from: http://blog.nodejitsu.com/npm-innovation-through-modularity/)

For those that – like myself – found it difficult to understand how to tap into the sheer power of npm modules as a font end developer, simply use browserify. npm modules are prepared following the CommonJS module definition spec. Browserify works natively with that and “compiles” all the dependencies of a npm modules into a single bundle.js file that you can use on the front end through a script tag as you would in plain HTML. You can learn more about browserify and module definitions and how to use browserify.

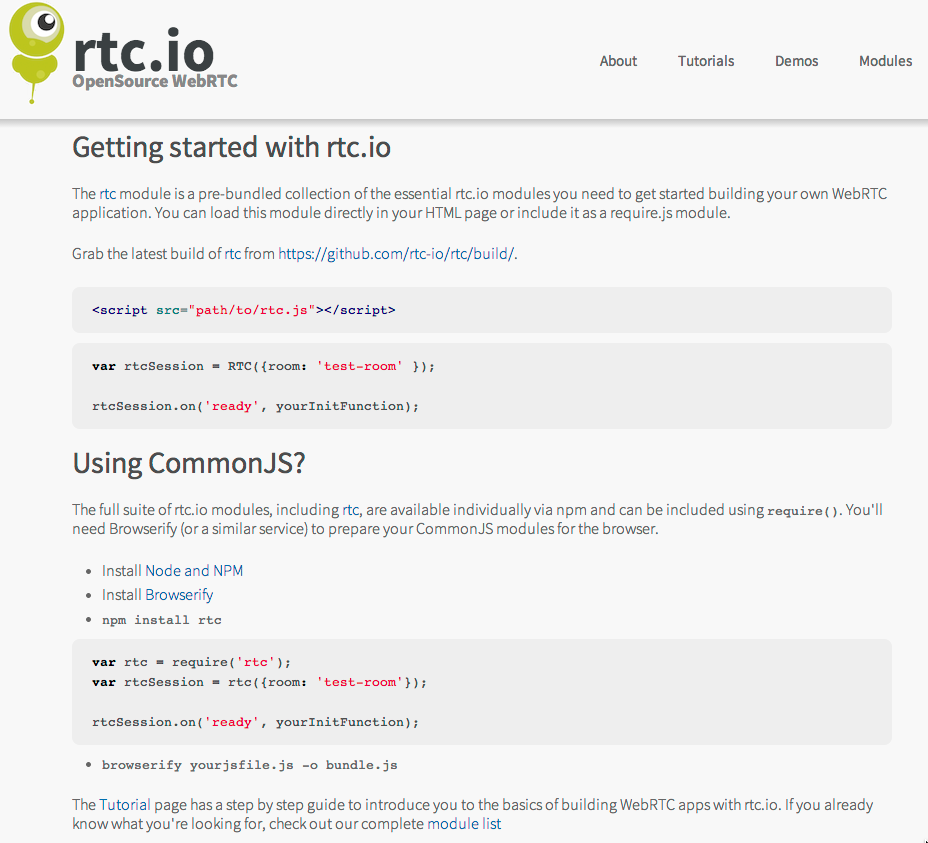
For those of you not quite ready to dive in with browserify we have prepared prepared the rtc module, which exposes the most commonly used packages of rtc.io through an “RTC” object from a browserified JavaScript file. You can also directly download the JavaScript file from GitHub.

Using rtc.io rtc JS library

So, I hope you enjoy rtc.io and I hope you enjoy my slides and large collection of interesting links inside the deck, and of course: enjoy WebRTC! Thanks to Damon, JEeff, Cathy, Pete and Nathan – you’re an awesome team!

On a side note, I was really excited to meet the author of browserify, James Halliday (@substack) at WDCNZ, whose talk on “building your own tools” seemed to take me back to the times where everything was done on the command-line. I think James is using Node and the Web in a way that would appeal to a Linux Kernel developer. Fascinating!!

AppRTC : Google’s WebRTC test app and its parameters

If you’ve been interested in WebRTC and haven’t lived under a rock, you will know about Google’s open source testing application for WebRTC: AppRTC.

When you go to the site, a new video conferencing room is automatically created for you and you can share the provided URL with somebody else and thus connect (make sure you’re using Google Chrome, Opera or Mozilla Firefox).

We’ve been using this application forever to check whether any issues with our own WebRTC applications are due to network connectivity issues, firewall issues, or browser bugs, in which case AppRTC breaks down, too. Otherwise we’re pretty sure to have to dig deeper into our own code.

Now, AppRTC creates a pretty poor quality video conference, because the browsers use a 640×480 resolution by default. However, there are many query parameters that can be added to the AppRTC URL through which the connection can be manipulated.

Here are my favourite parameters:

  • hd=true : turns on high definition, ie. minWidth=1280,minHeight=720
  • stereo=true : turns on stereo audio
  • debug=loopback : connect to yourself (great to check your own firewalls)
  • tt=60 : by default, the channel is closed after 30min – this gives you 60 (max 1440)

For example, here’s how a stereo, HD loopback test would look like: https://apprtc.appspot.com/?r=82313387&hd=true&stereo=true&debug=loopback .

This is not the limit of the available parameter, though. Here are some others that you may find interesting for some more in-depth geekery:

  • ss=[stunserver] : in case you want to test a different STUN server to the default Google ones
  • ts=[turnserver] : in case you want to test a different TURN server to the default Google ones
  • tp=[password] : password for the TURN server
  • audio=true&video=false : audio-only call
  • audio=false : video-only call
  • audio=googEchoCancellation=false,googAutoGainControl=true : disable echo cancellation and enable gain control
  • audio=googNoiseReduction=true : enable noise reduction (more Google-specific parameters)
  • asc=ISAC/16000 : preferred audio send codec is ISAC at 16kHz (use on Android)
  • arc=opus/48000 : preferred audio receive codec is opus at 48kHz
  • dtls=false : disable datagram transport layer security
  • dscp=true : enable DSCP
  • ipv6=true : enable IPv6

AppRTC’s source code is available here. And here is the file with the parameters (in case you want to check if they have changed).

Have fun playing with the main and always up-to-date WebRTC application: AppRTC.

UPDATE 12 May 2014

AppRTC now also supports the following bitrate controls:

  • arbr=[bitrate] : set audio receive bitrate
  • asbr=[bitrate] : set audio send bitrate
  • vsbr=[bitrate] : set video receive bitrate
  • vrbr=[bitrate] : set video send bitrate

Example usage: https://apprtc.appspot.com/?r=&asbr=128&vsbr=4096&hd=true

Use deck.js as a remote presentation tool

deck.js is one of the new HTML5-based presentation tools. It’s simple to use, in particular for your basic, every-day presentation needs. You can also create more complex slides with animations etc. if you know your HTML and CSS.

Yesterday at linux.conf.au (LCA), I gave a presentation using deck.js. But I didn’t give it from the lectern in the room in Perth where LCA is being held – instead I gave it from the comfort of my home office at the other end of the country.

I used my laptop with in-built webcam and my Chrome browser to give this presentation. Beforehand, I had uploaded the presentation to a Web server and shared the link with the organiser of my speaker track, who was on site in Perth and had set up his laptop in the same fashion as myself. His screen was projecting the Chrome tab in which my slides were loaded and he had hooked up the audio output of his laptop to the room speaker system. His camera was pointed at the audience so I could see their reaction.

I loaded a slide master URL:
http://html5videoguide.net/presentations/lca_2014_webrtc/?master
and the room loaded the URL without query string:
http://html5videoguide.net/presentations/lca_2014_webrtc/.

Then I gave my talk exactly as I would if I was in the same room. Yes, it felt exactly as though I was there, including nervousness and audience feedback.

How did we do that? WebRTC (Web Real-time Communication) to the rescue, of course!

We used one of the modules of the rtc.io project called rtc-glue to add the video conferencing functionality and the slide navigation to deck.js. It was actually really really simple!

Here are the few things we added to deck.js to make it work:

  • Code added to index.html to make the video connection work:
    <meta name="rtc-signalhost" content="http://rtc.io/switchboard/">
    <meta name="rtc-room" content="lca2014">
    ...
    <video id="localV" rtc-capture="camera" muted></video>
    <video id="peerV" rtc-peer rtc-stream="localV"></video>
    ...
    <script src="glue.js"></script>
    <script>
    glue.config.iceServers = [{ url: 'stun:stun.l.google.com:19302' }];
    </script>
    

    The iceServers config is required to punch through firewalls – you may also need a TURN server. Note that you need a signalling server – in our case we used http://rtc.io/switchboard/, which runs the code from rtc-switchboard.

  • Added glue.js library to deck.js:

    Downloaded from https://raw.github.com/rtc-io/rtc-glue/master/dist/glue.js into the source directory of deck.js.

  • Code added to index.html to synchronize slide navigation:
    glue.events.once('connected', function(signaller) {
      if (location.search.slice(1) !== '') {
        $(document).bind('deck.change', function(evt, from, to) {
          signaller.send('/slide', {
            idx: to,
            sender: signaller.id
          });
        });
      }
      signaller.on('slide', function(data) {
        console.log('received notification to change to slide: ', data.idx);
        $.deck('go', data.idx);
      });
    });
    

    This simply registers a callback on the slide master end to send a slide position message to the room end, and a callback on the room end that initiates the slide navigation.

And that’s it!

You can find my slide deck on GitHub.

Feel free to write your own slides in this manner – I would love to have more users of this approach. It should also be fairly simple to extend this to share pointer positions, so you can actually use the mouse pointer to point to things on your slides remotely. Would love to hear your experiences!

Note that the slides are actually a talk about the rtc.io project, so if you want to find out more about these modules and what other things you can do, read the slide deck or watch the talk when it has been published by LCA.

Many thanks to Damon Oehlman for his help in getting this working.

BTW: somebody should really fix that print style sheet for deck.js – I’m only ever getting the one slide that is currently showing. 😉

WebRTC books – a brief review

I just finished reading Rob Manson’s awesome book “Getting Started with WebRTC” and I can highly recommend it for any Web developer who is interested in WebRTC.

Rob explains very clearly how to create your first video, audio or data peer-connection using WebRTC in current Google Chrome or Firefox (I think it also now applies to Opera, though that wasn’t the case when his book was published). He makes available example code, so you can replicate it in your own Web application easily, including the setup of a signalling server. He also points out that you need a ICE (STUN/TURN) server to punch through firewalls and gives recommendations for what software is available, but stops short of explaining how to set them up.

Rob’s focus is very much on the features required in a typical Web application:

  • video calls
  • audio calls
  • text chats
  • file sharing

In fact, he provides the most in-depth demo of how to set up a good file sharing interface I have come across.

Rob then also extends his introduction to WebRTC to two key application areas: education and team communication. His recommendations are spot on and required reading for anyone developing applications in these spaces.

Before Rob’s book, I have also read Alan Johnson and Dan Burnett’s “WebRTC” book on APIs and RTCWEB protocols of the HTML5 Real-Time Web.

Alan and Dan’s book was written more than a year ago and explains that state of standardisation at that time. It’s probably a little out-dated now, but it still gives you good foundations on why some decisions were made the way they are and what are contentious issues (some of which still remain). If you really want to understand what happens behind the scenes when you call certain functions in the WebRTC APIs of browsers, then this is for you.

Alan and Dan’s book explains in more details than Rob’s book how IP addresses of communication partners are found, how firewall holepunching works, how sessions get negotiated, and how the standards process works. It’s probably less useful to a Web developer who just wants to implement video call functionality into their Web application, though if something goes wrong you may find yourself digging into the details of SDP, SRTP, DTLS, and other cryptic abbreviations of protocols that all need to work together to get a WebRTC call working.

Overall, both books are worthwhile and cover different aspects of WebRTC that you will stumble across if you are directly dealing with WebRTC code.

WebVTT Discussions at FOMS

At the recent FOMS (Foundations of Open Media Software and Standards) Developer Workshop, we had a massive focus on WebVTT and the state of its feature set. You will find links to summaries of the individual discussions in the FOMS Schedule page. Here are some of the key results I went away with.

1. WebVTT Regions

The key driving force for improvements to WebVTT continues to be the accurate representation of CEA608/708 captioning. As part of that drive, we’ve introduced regions (the CEA708 “window” concept) to WebVTT. WebVTT regions satisfy multiple requirements of CEA608/708 captions:

  1. support for rollup captions
  2. support for background color and border color on a group of cues independent of the background color of the individual cue
  3. possibility to move a group of cues from one location on screen to a different
  4. support to specify an anchor point and a growth direction for cues when their text size changes
  5. support for specifying a fixed number of lines to be rendered
  6. possibility to specify which region is rendered in front of which other one when regions overlap

While WebVTT regions enable us to satisfy all of the above points, the specification isn’t actually complete yet and some of the above needs aren’t satisfied yet.

We have an open bug to move a region elsewhere. A first discussion at FOMS seemed to to indicate that we’ll have to add syntax for updating a region at a particular time and thus give region definitions a way to be valid only for a certain time frame. I can imagine that the region definitions that we have in the header of the WebVTT file now would have an implicitly defined time frame from the start to the end of the file, but can be overruled by a re-definition anywhere within the WebVTT file. That redefinition needs to provide a start and end time.

We registered a bug to add specifying the width and height of regions (and possibly of cues) by em (i.e. by multiples of the largest character in a font). This should allow us to have the region grow/shrink around the region anchor point with a change of font size by script or a user. em specifications should also be applied to cues – that matches the column count of CEA708/608 better.

When regions overlap, the original region extension spec already suggested a “layer” cue setting. It will be easy to add it.

Another change that we will ultimately need is the “scroll” setting: we will need to introduce support for scrolling text down or from left-to-right or right-to-left, e.g. vertical scrolling text seems to be used in some Chinese caption use cases.

2. Unify Rendering Approach

The introduction of regions created a second code path in the rendering spec with some duplication. At FOMS we discussed if it was possible to unify that. The suggestion is to render all cues into a region. Those that are not part of a region would be rendered into an anonymous region that covers the complete viewport. There may be some consequences to this, e.g. cue settings should be usable across all cues, no matter whether or not part of a region, and avoiding cue overlap may need to be done within regions.

Here’s a rough outline of the path of the new rendering algorithm:

(1) Render the regions:

Specified Region Anonymous Region
Render values as given: Render following values:
  • width
  • lines
  • regionanchor
  • viewportanchor
  • scroll
  • 100%
  • videoheight/lineheight
  • 0,0
  • 0,0
  • none

(2) Render the cues:

  • Create a cue box and put it in its region (anonymous if none given).
  • Calculate position & size of cue box from cue settings (position, line, size).
  • Calculate position of cue text inside cue box from remaining cue settings (vertical, align).

3. Vertical Features

WebVTT includes vertical rendering, both right-to-left and left-to-right. However, regions are not defined for vertical. Eventually, we’re going to have to look at the vertical features of WebVTT with more details and figure out whether the spec is working for them and what real-world requirements we have missed. We hope we can get some help from users in countries where vertically rendered captions/subtitles are the norm.

4. Best Practices

Some of he WebVTT users at FOMS suggested it would be advantageous to start a list of “best practices” for how to author captions with WebVTT. Example recommendations are:

  • Use line numbers only to position cues from top or bottom of viewport. Don’t use otherwise.
  • Note that when the user increases the fontsize in rollup captions and thus introduces new line breaks, your cues will roll by faster because the number of lines of a rollup is fixed.
  • Make sure to use &lrm; and &rlm; UTF-8 markers to control the directionality of your text.

It would be nice if somebody started such a document.

5. Non-caption use cases

Instead of continuing to look back and improve our support of captions/subtitles in WebVTT, one session at FOMS also went ahead and looked forward to other use cases. The following requirements came out of this:

5.1 Preview Thumbnails

A common use case for timed data is the use of preview thumbnails on the navigation bar of videos. A native implementation of preview thumbnails would allow crawlers and search engines to have a standardised way of extracting timed images for media files, so introduction of a new @kind value “thumbnails” was suggested.

The content of a “thumbnails” cue could be any of:

  • an image URL
  • a sprite URL to a single image
  • a spatial & temporal media fragment URL to a media resource
  • base64 encoded image (data URI)
  • an iframe offset to the media resource

The suggestion is to allow anything that would work in a img @src attribute as value in a cue of @kind=”thumbnails”. Responsive images might also be useful for a track of @kind=”thumbnails”. It may even be possible to define an inband thumbnail track based on the track of @kind=”thumbnails”. Such cues should also work in the JavaScript track API.

5.2 Chapter markers

There is interest to put richer content than just a chapter title into chapter cues. Often, chapters consist of a title, text and and image. The text is not so important, but the image is used almost everywhere that chapters are used. There may be a need to extend chapter cue content with images, similar to what a @kind=”thumbnails” track offers.

The conclusion that we arrived at was that we need to make @kind=”thumbnails” work first and then look at using the learnings from that to extend @kind=”chapters”.

5.3 Inband tracks for live video

A difficult topic was opened with the question of how to transport text tracks in live video. In live captioning, end times are never created for cues, but are implied by the start time of the next cue. This is a use case that hasn’t been addressed in HTML5/WebVTT yet. An old proposal to allow a special end time value of “NEXT” was discussed and recommended for adoption. Also, there was support for the spec change that stops blocking loading VTT until all cues have been loaded.

5.4 Cross-domain VTT loading

A brief discussion centered around the fact that the spec disallows cross-domain loading of WebVTT files, but that no browser implements this. This needs to be discussion at the HTML WG level.

6. Regions in live captioning

The final topic that we discussed was how we could provide support for regions in live captioning.

  • The currently active region definitions will need to be come part of every header of every VTT file segment that HLS uses, so it’s available in case the cues in the segment file reference it.
  • “NEXT” in end time markers would make authoring of live captioned VTT files easier.
  • If the application wants to use 1 word at a time and doesn’t want to delay sending the word until the full cue is authored (e.g. in a Hangout type environment), we will need to introduce the concept of “cue continuation markers”, so we know that a cue could be extended with the next VTT file fragment.

This is an extensive and impressive amount of discussion around WebVTT and a lot of new work to be performed in the future. I’m very grateful for all the people who have contributed to these discussions at FOMS and will hopefully continue to help get the specifications right.

Summary Video Accessibility Talk

I’ve just got off a call to the UK Digital TV Group, for which I gave a talk on HTML5 video accessibility (slides best viewed in Google Chrome).

The slide provide a high-level summary of the accessibility features that we’ve developed in the W3C for HTML5, including:

  • Subtitles & Captions with WebVTT and the track element
  • Video Descriptions with WebVTT, the track element and speech synthesis
  • Chapters with WebVTT for semantic navigation
  • Audio Descriptions through synchronising an audio track with a video
  • Sign Language video synchronized with a main video

I received some excellent questions.

The obvious one was about why WebVTT and not TTML. While for anyone who has tried to implement TTML support, the advantages of WebVTT should be clear, for some the decision of the browsers to go with WebVTT still seems to be bothersome. The advantages of CSS over XSL-FO in a browser-context are obvious, but not as much outside browsers. So, the simplicity of WebVTT and the clear integration with HTML have to speak for themselves. Conversion between TTML and WebVTT was a feature that was being asked for.

I received a question about how to support ducking (reduce the volume of the main audio track) when using video descriptions. My reply was to either use video descriptions with WebVTT and do ducking during the times that a cue is active, or when using audio descriptions (i.e. actual audio tracks) to add an additional WebVTT file of kind=metadata to mark the intervals in which to do ducking. In both cases some JavaScript will be necessary.

I received another question about how to do clean audio, which I had almost forgotten was a requirement from our earlier media accessibility document. “Clean audio” consists of isolating the audio channel containing the spoken dialog and important non-speech information that can then be amplified or otherwise modified, while other channels containing music or ambient sounds are attenuated. I suggested using the mediagroup attribute to provide a main video element (without an audio track) and then the other channels as parallel audio tracks that can be turned on and off and attenuated individually. There is some JavaScript coding involved on top of the APIs that we have defined in HTML, but it can be implemented in browsers that support the mediagroup attribute.

Another question was about the possibilities to extend the list of @kind attribute values. I explained that right now we have a proposal for a new text track kind=”forced” so as to provide forced subtitles for sections of video with foreign language. These would be on when no other subtitle or caption tracks are activated. I also explained that if there is a need for application-specific text tracks, the kind=”metadata” would be the correct choice.

I received some further questions, in particular about how to apply styling to captions (e.g. color changes to text) and about how closely the browser are able to keep synchronization across multiple media elements. The earlier was easily answered with the ::cue pseudo-element, but the latter is a quality of implementation feature, so I had to defer to individual browsers.

Overall it was a good exercise to summarize the current state of HTML5 video accessibility and I was excited to show off support in Chrome for all the features that we designed into the standard.

New Challenges

I finished up at Google last week and am now working at NICTA, an Australian ICT research institute.

My work with Google was exciting and I learned a lot. I like to think that Google also got a lot out of me – I coded and contributed to some YouTube caption features, I worked on Chrome captions and video controls, and above all I worked on video accessibility for HTML at the W3C.

I was one of the key authors of the W3C Media Accessibility Requirements document that we created in the Media Accessibility Task Force of the W3C HTML WG. I then went on to help make video accessibility a reality. We created WebVTT and the <track> element and applied it to captions, subtitles, chapters (navigation), video descriptions, and metadata. To satisfy the need for synchronisation of video with other media resources such as sign language video or audio descriptions, we got the MediaController object and the @mediagroup attribute.

I must say it was a most rewarding time. I learned a lot about being productive at Google, collaborate successfully over the distance, about how the WebKit community works, and about the new way of writing W3C standard (which is more like pseudo-code). As one consequence, I am now a co-editor of the W3C HTML spec and it seems I am also about to become the editor of the WebVTT spec.

At NICTA my new focus of work is WebRTC. There is both a bit of research and a whole bunch of application development involved. I may even get to do some WebKit development, if we identify any issues with the current implementation. I started a week ago and am already amazed by the amount of work going on in the WebRTC space and the amazing number of open source projects playing around with it. Video conferencing is a new challenge and I look forward to it.

Video Conferencing in HTML5: WebRTC via Socket.io

Six months ago I experimented with Web sockets for WebRTC and the early implementations of PeerConnection in Chrome. Last week I gave a presentation about WebRTC at Linux.conf.au, so it was time to update that codebase.

I decided to use socket.io for the signalling following the idea of Luc, which made the server code even smaller and reduced it to a mere reflector:

 var app = require('http').createServer().listen(1337);
 var io = require('socket.io').listen(app);

 io.sockets.on('connection', function(socket) {
         socket.on('message', function(message) {
         socket.broadcast.emit('message', message);
     });
 });

Then I turned to the client code. I was surprised to see the massive changes that PeerConnection has gone through. Check out my slide deck to see the different components that are now necessary to create a PeerConnection.

I was particularly surprised to see the SDP object now fully exposed to JavaScript and thus the ability to manipulate it directly rather than through some API. This allows Web developers to manipulate the type of session that they are asking the browsers to set up. I can imaging e.g. if they have support for a video codec in JavaScript that the browser does not provide built-in, they can add that codec to the set of choices to be offered to the peer. While it is flexible, I am concerned if this might create more problems than it solves. I guess we’ll have to wait and see.

I was also surprised by the need to use ICE, even though in my experiment I got away with an empty list of ICE servers – the ICE messages just got exchanged through the socket.io server. I am not sure whether this is a bug, but I was very happy about it because it meant I could run the whole demo on a completely separate network from the Internet.

The most exciting news since my talk is that Mozilla and Google have managed to get a PeerConnection working between Firefox and Chrome – this is the first cross-browser video conference call without a plugin! The code differences are minor.

Since the specification of the WebRTC API and of the MediaStream API are now official Working Drafts at the W3C, I expect other browsers will follow. I am also looking forward to the possibilities of:

The best places to learn about the latest possibilities of WebRTC are webrtc.org and the W3C WebRTC WG. code.google.com has open source code that continues to be updated to the latest released and interoperable features in browsers.

The video of my talk is in the process of being published. There is a MP4 version on the Linux Australia mirror server, but I expect it will be published properly soon. I will update the blog post when that happens.

What is “interoperable TTML”?

I’ve just tried to come to terms with the latest state of TTML, the Timed Text Markup Language.

TTML has been specified by the W3C Timed Text Working Group and released as a RECommendation v1.0 in November 2010. Since then, several organisations have tried to adopt it as their caption file format. This includes the SMPTE, the EBU (European Broadcasting Union), and Microsoft.

Both, Microsoft and the EBU actually looked at TTML in detail and decided that in order to make it usable for their use cases, a restriction of its functionalities is needed.

EBU-TT

The EBU released EBU-TT, which restricts the set of valid attributes and feature. “The EBU-TT format is intended to constrain the features provided by TTML, especially to make EBU-TT more suitable for the use with broadcast video and web video applications.” (see EBU-TT).

In addition, EBU-specific namespaces were introduce to extend TTML with EBU-specific data types, e.g. ebuttdt:frameRateMultiplierType or ebuttdt:smpteTimingType. Similarly, a bunch of metadata elements were introduced, e.g. ebuttm:documentMetadata, ebuttm:documentEbuttVersion, or ebuttm:documentIdentifier.

The use of namespaces as an extensibility mechanism will ascertain that EBU-TT files continue to be valid TTML files. However, any vanilla TTML parser will not know what to do with these custom extensions and will drop them on the floor.

Simple Delivery Profile

With the intention to make TTML ready for “internet delivery of Captions originated in the United States”, Microsoft proposed a “Simple Delivery Profile for Closed Captions (US)” (see Simple Profile). The Simple Profile is also a restriction of TTML.

Unfortunately, the Microsoft profile is not the same as the EBU-TT profile: for example, it contains the “set” element, which is not conformant in EBU-TT. Similarly, the supported style features are different, e.g. Simple Profile supports “display-region”, while EBU-TT does not. On the other hand, EBU-TT supports monospace, sans-serif and serif fonts, while the Simple profile does not.

Thus files created for the Simple Delivery Profile will not work on players that expect EBU-TT and the reverse.

Fortunately, the Simple Delivery Profile does not introduce any new namespaces and new features, so at least it is an explicit subpart of TTML and not both a restriction and extension like EBU-TT.

SMPTE-TT

SMPTE also created a version of the TTML standard called SMPTE-TT. SMPTE did not decide on a subset of TTML for their purposes – it was simply adopted as a complete set. “This Standard provides a framework for timed text to be supported for content delivered via broadband means,…” (see SMPTE-TT).

However, SMPTE extended TTML in SMPTE-TT with an ability to store a binary blob with captions in another format. This allows using SMPTE-TT as a transport format for any caption format and is deemed to help with “backwards compatibility”.

Now, instead of specifying a profile, SMPTE decided to define how to convert CEA-608 captions to SMPTE-TT. Even if it’s not called a “profile”, that’s actually what it is. It even has its own namespace: “m608:”.

Conclusion

With all these different versions of TTML, I ask myself what a video player that claims support for TTML will do to get something working. The only chance it has is to implement all the extensions defined in all the different profiles. I pity the player that has to deal with a SMPTE-TT file that has a binary blob in it and is expected to be able to decode this.

Now, what is a caption author supposed to do when creating TTML? They obviously cannot expect all players to be able to play back all TTML versions. Should they create different files depending on what platform they are targeting, i.e. a EBU-TT version, a SMPTE-TT version, a vanilla TTML version, and a Simple Delivery Profile version? Should they by throwing all the features of all the versions into one TTML file and hope that the players will pick out the right things that they require and drop the rest on the floor?

Maybe the best way to progress would be to make a list of the “safe” features: those features that every TTML profile supports. That may be the best way to get an “interoperable TTML” file. Here’s me hoping that this minimal set of features doesn’t just end up being the usual (starttime, endtime, text) triple.

UPDATE:

I just found out that UltraViolet have their own profile of SMPTE-TT called CFF-TT (see UltraViolet FAQ and spec). They are making some SMPTE-TT fields optional, but introduce a new @forcedDisplayMode attribute under their own namespace “cff:”.

Video Conferencing in HTML5: WebRTC via Web Sockets

A bit over a week ago I gave a presentation at Web Directions Code 2012 in Melbourne. Maxine and John asked me to speak about something related to HTML5 video, so I went for the new shiny: WebRTC – real-time communication in the browser.

Presentation slides

I only had 20 min, so I had to make it tight. I wanted to show off video conferencing without special plugins in Google Chrome in just a few lines of code, as is the promise of WebRTC. To a large extent, I achieved this. But I made some interesting discoveries along the way. Demos are in the slide deck.

UPDATE: Opera 12 has been released with WebRTC support.

Housekeeping: if you want to replicate what I have done, you need to install a Google Chrome Web Browser 19+. Then make sure you go to chrome://flags and activate the MediaStream and PeerConnection experiment(s). Restart your browser and now you can experiment with this feature. Big warning up-front: it’s not production-ready, since there are still changes happening to the spec and there is no compatible implementation by another browser yet.

Here is a brief summary of the steps involved to set up video conferencing in your browser:

  1. Set up a video element each for the local and the remote video stream.
  2. Grab the local camera and stream it to the first video element.
  3. (*) Establish a connection to another person running the same Web page.
  4. Send the local camera stream on that peer connection.
  5. Accept the remote camera stream into the second video element.

Now, the most difficult part of all of this – believe it or not – is the signalling part that is required to build the peer connection (marked with (*)). Initially I wanted to run completely without a server and just enter the remote’s IP address to establish the connection. This is, however, not a functionality that the PeerConnection object provides [might this be something to add to the spec?].

So, you need a server known to both parties that can provide for the handshake to set up the connection. All the examples that I have seen, such as https://apprtc.appspot.com/, use a channel management server on Google’s appengine. I wanted it all working with HTML5 technology, so I decided to use a Web Socket server instead.

I implemented my Web Socket server using node.js (code of websocket server). The video conferencing demo is in the slide deck in an iframe – you can also use the stand-alone html page. Works like a treat.

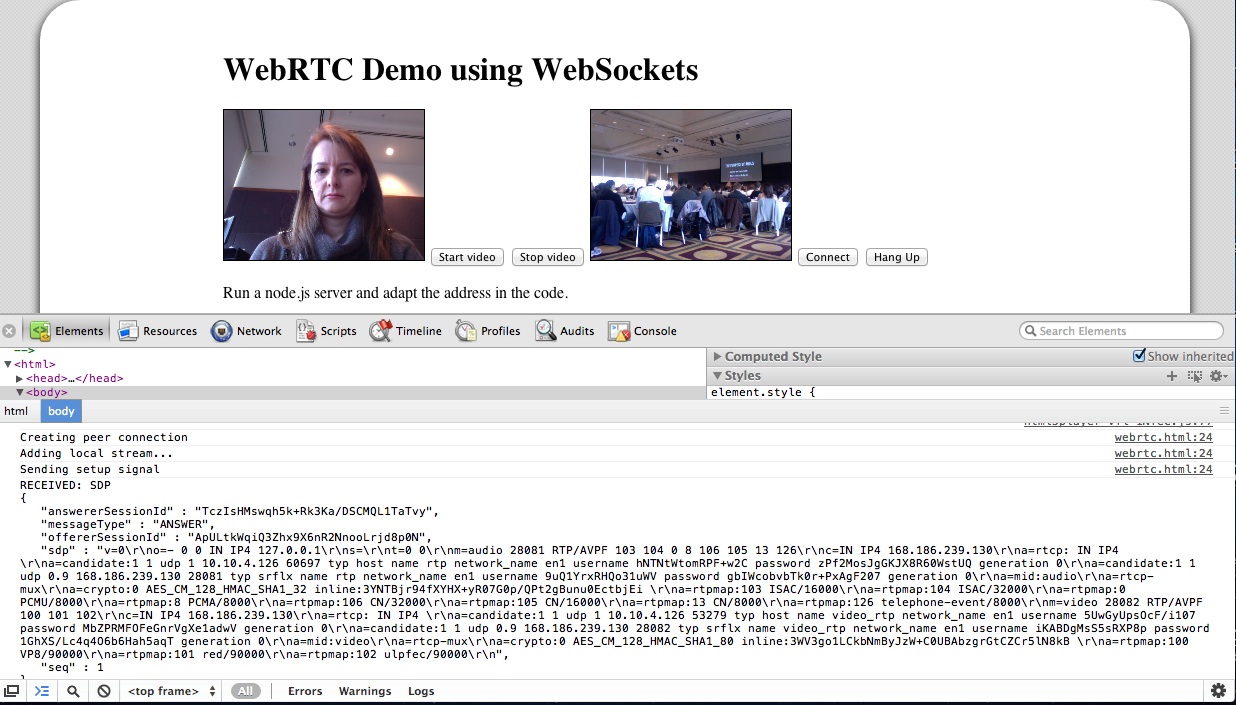
While it is still using Google’s STUN server to get through NAT, the messaging for setting up the connection is running completely through the Web Socket server. The messages that get exchanged are plain SDP message packets with a session ID. There are OFFER, ANSWER, and OK packets exchanged for each streaming direction. You can see some of it in the below image:

WebRTC demo

I’m not running a public WebSocket server, so you won’t be able to see this part of the presentation working. But the local loopback video should work.

At the conference, it all went without a hitch (while the wireless played along). I believe you have to host the WebSocket server on the same machine as the Web page, otherwise it won’t work for security reasons.

A whole new world of opportunities lies out there when we get the ability to set up video conferencing on every Web page – scary and exciting at the same time!